
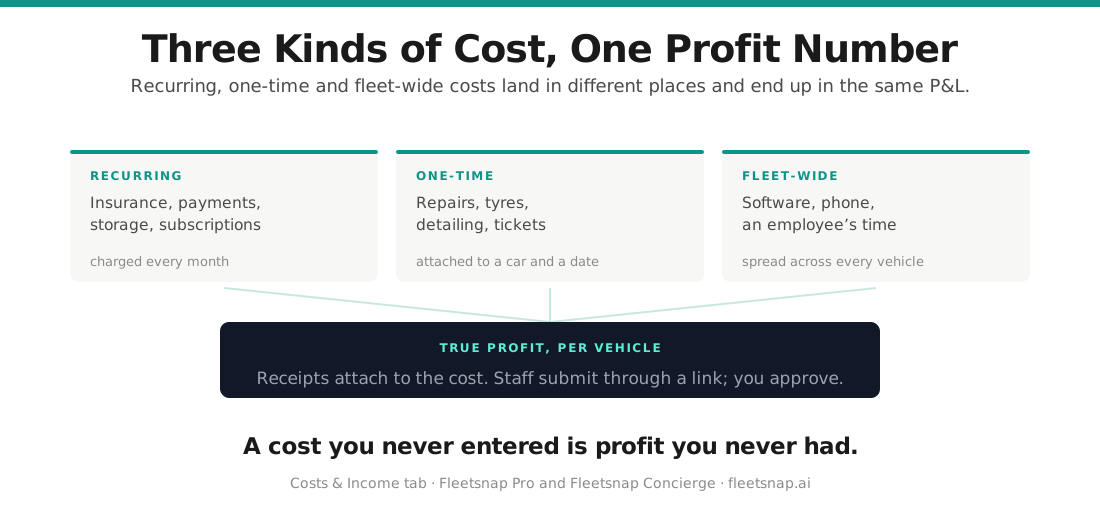
Turo shows you what a car earned. It does not know what the car cost you. FleetSnap's Costs & Income tab is where you log insurance, car payments, cleaning, repairs, office rent, and non-Turo income so your Fleet P&L and partner statements show real profit per vehicle, not gross payout. This guide names every button exactly as it appears in the product.
Step 1 - Open Costs & Income
In the earnings dashboard, click "Costs & Income" in the side navigation. The page is headed "Costs & income" and has four sub-tabs:
- "Recurring monthly" - per-vehicle costs that repeat every month
- "One-time" - per-vehicle costs on a single date
- "Fleet-wide" - business overhead that isn't tied to one car
- "Other income" - money that came in outside Turo
A "Search by expense, vehicle, or plate…" box filters whichever list you're on.
Step 2 - Add a recurring monthly cost
Use "Recurring monthly" for car payments, insurance, parking, GPS trackers, and anything else billed every month per vehicle.
- "What is it?" - a short name, e.g. Insurance or Car payment
- "$ / month" - the monthly amount
- "Vehicle" - one car, or "All vehicles" to apply it to every car
- "Starts" / "Ends (blank = ongoing)" - optional month pickers. Leave both blank for a cost that has always applied and still does; set "Ends" when a loan is paid off or a policy ends.
- Click "Add".
The cost shows in the list below as $X /mo with its vehicle scope. Edit or remove a row with the pencil and X icons.
Step 3 - Add a one-time cost
Use "One-time" for cleaning, detailing, oil changes, tires, brake jobs, tolls, and other single-date expenses.
- "What is it?" - e.g. Cleaning or Brake repair
- "$ amount"
- "Vehicle" - the car it belongs to
- "Date" - the day you paid
- Click "Add".
The date decides which month's P&L and statement the cost lands on.
Step 4 - Add a fleet-wide operational cost
Use "Fleet-wide" for overhead that isn't about one car: office or storage rent, software, payroll, business insurance, marketing, an accountant.
- "What is it?" and "$ amount"
- "Category" - Payroll, Rent, Software, Insurance, Marketing, Professional services, or Other
- "Frequency" - Monthly, Weekly, Annual, or One-time (a one-time fleet cost asks for a "Month"; the others offer "Starts (optional)" / "Ends (optional)")
- "Allocate to vehicles" - Keep as fleet overhead (default), Equal per active vehicle, or By positive vehicle revenue
- Click "Add".
As the form notes, fleet overhead stays outside vehicle statements unless you allocate it, and equal allocation includes active vehicles with $0 revenue.
Step 5 - Attach receipts
On a paid plan, the "Recurring monthly" and "One-time" forms show "Attach receipt (optional)" under the fields. After upload you'll see "Receipt attached" (the X next to it removes it before you save). On a saved row, click "Receipt" to open the file, "Replace" to upload a different one, or "Remove receipt" to delete it. Fleet-wide rows don't take receipts.
Step 6 - Let staff submit costs
Your cleaner, mechanic, or co-host can log expenses straight into the right vehicle without an account and without seeing your numbers.
- Scroll to the bottom of Costs & Income and expand "Staff submission links". (If you're not signed in, the card reads "Have your team submit costs" and asks you to sign in first.)
- Click "Generate staff link". On the free plan the button is disabled and hovering shows "Let staff submit costs without seeing your earnings" with an upgrade prompt.
- Click "Copy" next to the link and send it to your staff. Each link shows how many submissions it has and how many days remain.
- To disable a link, click "Revoke link" (the X on the row).
The card spells out the two guarantees: "Private by design" - staff submit through a simple mobile form and never see your earnings, revenue, or other vehicles - and "All your receipts, in one place" - every receipt they upload is stored and attached to the right vehicle.
What your staff sees: a page headed "Submit an expense" with "Your name", "Vehicle(s)" (searchable, multi-select), "Amount per vehicle (USD)", "Date", "Description", "Category", a "Receipt" drop zone ("Click to upload" or drag and drop), optional "Notes", and a "Submit expense" button. The page tells them submissions go to the fleet owner for approval before they show up in reports.
On the classic Fleet P&L layout, the equivalent card is "Staff & Sharing Links" with a "Generate Staff Expense Link" button.
Step 7 - Approve or reject staff-submitted expenses
Nothing a staff member submits touches your books until you approve it.
- Open the "Fleet P&L" tab. If anything is waiting, a "Staff-submitted expenses" card sits at the top with a N pending badge.
- For each item, click "View receipt" to check the attachment.
- Click "Approve" to count it in your P&L and statements, or "Reject" to keep it out. Rejecting opens "Reject staff submission", where you type a "Rejection reason" (e.g. duplicate receipt, wrong vehicle, not a business expense) and click "Reject submission".
Approved items appear in the "One-time" list on Costs & Income, where you can open the receipt, change the "Expense date", or remove them. Rejected items stay visible under "Rejected submissions".
Step 8 - Add income that isn't from Turo
Private rentals, referral bonuses, insurance reimbursements, and similar money belong on the "Other income" sub-tab so your P&L and partner statements stay complete.
- "What is it?" - e.g. Private rental, Sept
- "$ amount"
- "Vehicle" - one car, or "Fleet-wide"
- "Category" - Private rental, Referral, Reimbursement, or Other
- "Date", then click "Add".
The same entries also live in the "Other Income" card on the "Fleet P&L" tab (subtitled private rentals, referrals, reimbursements): click "Add", fill in "Name", "Amount", "Date", and "Category", tick "Fleet-wide (all vehicles)" or choose specific vehicles under Assign to vehicle, and click "Add income". Private rental income is shared with the vehicle's partner at the private rental percentage shown on their split; referral, reimbursement, and other income stays with you as the host.
If your dashboard shows an "Add Costs" card instead
On the classic earnings layout, costs live on the "Fleet P&L" tab in a card titled "Add Costs" with three buttons: "Recurring (Monthly)", "One-Time", and "Fleet-Wide". Each opens a form:
- "Add Recurring Monthly Cost" - "Cost Name", "Monthly Amount", "Apply to Vehicles" (tick "All Vehicles" or search by name, plate, or VIN), plus optional "Start month" / "End month"
- "Add One-Time Cost" - "Cost Name", "Amount", "Month", "Apply to Vehicles"
- "Add Fleet-Wide Operational Cost" - "Cost Name", "Category" (Payroll, Rent / Office Space, Software & Tools, Business Insurance, Marketing & Advertising, Professional Services, Other), "Amount", "Frequency"
Saved costs are listed further down the tab ("Scroll down to view/edit saved costs"). If a saved cost points at a vehicle that is no longer in your data, a "Costs not matched to any vehicle" alert lets you "Reassign to vehicle", choosing "All Vehicles (fleet-wide)" or a specific car. The first-run wizard's "Add your costs" step uses the same three sub-tabs - "Recurring monthly", "One-time", "Fleet-wide" - with an "Apply to vehicles" multi-select.